You can log into the staging site to test your changes before publishing to the live site, at https://staging.yourdomain.com/wp-admin/
1. Change product from ‘Simple Product’ to ‘Variable Product’.
2. In the ‘Product data’ menu to the left hand side, click ‘Attributes’. Change ‘Custom product attribute’ to ‘Package Size’. Click ‘Add’.
3. Enable ‘Visible on the Product Page’ and ‘Used for Variations’. Under ‘Values’, click ‘Select All’. Click ‘Save Attributes’.
4. In the ‘Product data’ menu, click ‘Variations’. Change ‘Add variations’ to ‘Create Variations from all attributes’. Click ‘Go’. In the prompt that appears, click ‘OK’ to create variations from all attributes.
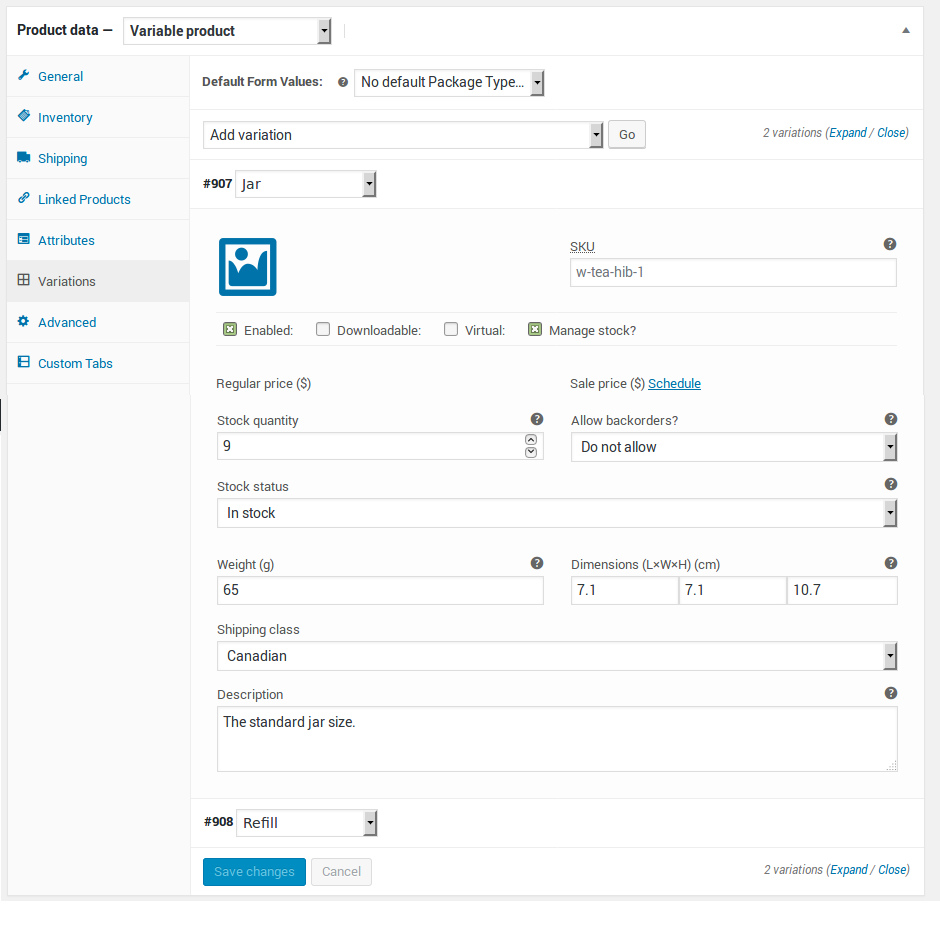
5. Clicking in the whitespace to the right of the variation name will open the options for each variation. This is where you can set the price, the weight, add a custom image for the variation and the size of the package. Shipping class will be ‘same as parent’. In the description field, you can set the text for the variation, such as ‘save on shipping with refill packages’.
6. When finished adding data for your variations, click the blue ‘Save changes’ button, then scroll back up and press the blue ‘Update’ or ‘Publish’ button.
Note about the shipping calculater & Lettermail:
The shipping calculator will automatically optimize the shipping cost, according to the Canada Post Lettermail pricesheet and the letter size limits. The wooCommerce shipping calculator does not take into account the weight of the envelope itself, so it is suggested to add some extra grams to the weight of your products within the variation settings to compensate for this.
If the products aren’t of uniform dimension, in other words one end is thicker than the other, if two items can be stacked on top of each other to approximate a uniform dimension and fit in an envelope, then perhaps in the variation size settings, it would be appropriate to take a measurement of two products stacked and divide that measurement by two.
No Comments Yet